Saturday, November 5, 2016

Design - Thermal Bridging and Air Infiltration (Cont'd)


This is the second of two posts on thermal bridging and air infiltration. The first post defined the three ways heat gets transferred -- by conduction, by convection and by radiation -- and what is meant by the building envelope.  Then the post focused on the transfer of heat by conduction through the building envelope. This post covers the other two heat transfer modes -- convection and radiation.

Convective Heat Loss
Air infiltration and exfiltration refer to the heat transferred in and out through the building envelope by air in motion -- convection.  Air infiltration is at it worst when winter winds push air through holes in the envelope, especially on windy days when there is a air pressure differential between the side of the building against which the wind is blowing and the leeward side of the building.  Heat is lost even in the absence of wind, however, as interior air exfiltrates, not only because heat seeks cold, but due to a pressure differential.  In summer, air infiltrates for the same reasons.  So here is my understanding of the best practices for controlling convective heat loss via what has come to be known as air sealing:

  • In the first place, design intentionally and build with precision in order to minimize potential holes in the envelope
  • Then seal all unavoidable holes with gaskets, caulk, tape, spray foam and drywall mud
    • Between parallel and touching structural members, such as double top plates
    • Between mud sills and concrete foundations
    • Between structural members and the sheathing
    • Between windows and doors and their rough openings
    • Between drywall intersections, especially walls meeting ceilings
    • Around penetrations in the envelope for such things as vents, furnace pipes, wiring, coaxial cables, electrical boxes and can lights
    • Within window frames; choose those that close against a sealing gasket instead of sliding -- such as casement, awning or hopper instead of horizontal sliders or single or double hung
    • Within double-glazed window panes by the addition of argon gas which, by being heavier than air, impedes heat-conveying convective currents between the layers of glass
    • Through fireplace doors and dampers
  • Use an airlock between outdoors and living spaces
  • Orient exterior doors away from the prevailing winter winds (in our locale, that would be south and east sides of the building)
  • Use air (and moisture) barriers such as latex-painted drywall interiorly and house wrap exteriorly*
  • Then, use a blower door test to measure the integrity of air sealing and identify leaks to be corrected before insulating and drywalling
Convection and Our Project
Super-insulating the walls and ceilings and going all out to eliminate thermal bridging
would not produce a zero energy, or energy neutral, home unless air infiltration is eliminated as well.  Johnston and Gibson in their book say, "A typical house has 2,000 liner ft. of cracks and gaps that allow air in and out, which can represent up to 50% of the heat loss in a building".

One of the advantages of being a task oriented DIYer instead of time oriented contractor, is that there is no reason not to be precise with construction first then compulsive about hole plugging.  I intend to buy a pneumatic caulk gun because I know how tedious, tiresome and time-consuming the caulking will be.

For at least the first story and as much of the second story as my stash of 3/4" salvaged lumber will allow, I intend to use the 3/4" individual boards for sheathing.  I will install them at a 45 degree angle as was commonly done before sheet goods were available.  The 45 degree orientation has two benefits.  When the cladding is attached over it, a row of fasteners will be spread over multiple boards so as not to cause splitting of a given board. And the diagionalization provides shear strength to the wall. The disadvantage of using 1x lumber is that it is impossible to seal all of the spaces between so many boards.  Consequently, I will use recycled 4 x 8 sheets of Masonite on the wall trusses before nailing on the sheathing boards.  I can then caulk from the inside just as if the wall was sheathed with OSB board. The Masonite will also add a quarter inch of thickness for fastening of the metal cladding. Unlike most of the contemporary man-made sheet goods, Masonite is manufactured with natural binders so that there is no worry about VOCs.

As far as air coming in through exterior doors, we will have a large 8' x 14' airlock so that the semi-conditioned air in the lock will attenuate incoming outside air before an interior door is opened.  The door between the kitchen and the screened patio will not be protected by an airlock so it will see little use during the winter.

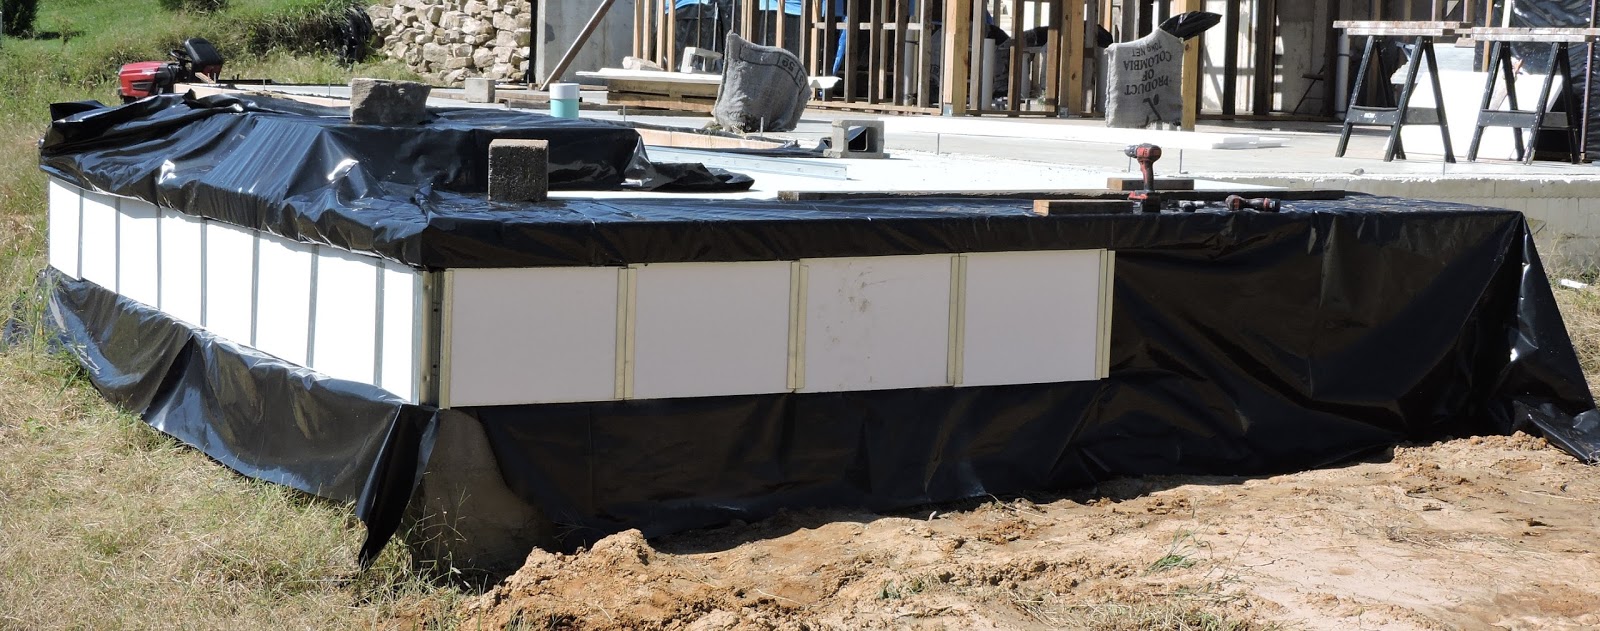
And needless to say, the earth sheltered parts of the envelope totally eliminate any chance of convective heat loss -- air doesn't pass through dirt and concrete very well!

We are seeking green building certification by either HERS or NABH Green Building Standards (Timeline - Alternative Certifications to LEED).  Part of the certification process is blower door testing to measure air infiltration.  I think we will be ready.


Radiation
Aside from stoves and fireplaces in the living space, the principal source of radiant heat is the sun.  The game here is to admit solar gain when you want it and and exclude it when you don't through the following measures for the northern hemisphere:
  • Orient the building for major solar gain through south-facing windows in winter but block the gain during summer with overhangs, deciduous trees and trellises
  • Incorporate well insulated thermal mass into the structure so as to trap and hold any intentional gain
  • Minimize the amount of glazing on the north and west and, to a lesser extent, the east
  • Use low-E glazing so as to slow the loss of solar heat back through the glass
  • Distribute (diffuse) incoming solar radiation with by either using translucent glass, rather than transparent, or light colors where the sun shines (ceilings, floors and walls) unless there is enough thermal mass to absorb the energy without overheating
Radiation and Our Project
We are intentionally avoiding stoves and fireplaces for the sake of better indoor air quality and to eliminate air infiltration/exfiltration via envelope-piercing chimneys.  Our heating (and air conditioning) system will be passive solar by virtue of the AGS system. But, rather than depend on solar gain in the winter, the gain will come from the summer sun.  (For basic information on the AGS system, click on "Timeline - Annualized GeoSolar" under "Featured Post in the column to the left and follow the trail of posts.  Or go to Wikipedia for a more succinct explanation.)  

Our design calls for south-facing glass with overhangs except possibly one east-facing window in the laundry room.  The overhangs will restrict direct solar gain to the cool/cold months (but with too much in the early fall, which will be grist for a future post on the design of the overhangs). We intend to use translucent glass in most of the second story clerestory windows backed up with light colored ceilings and walls so as to diffuse incoming sunlight instead of creating hot spots on the walls and furnishings. Because of
the AGS system, the concrete floor will remain essentially the same temperature year-round and will absorb the diffused energy gradually. Sunshine falling directly on it will be absorbed without hot spots by coloring it with medium, rather than dark, tones.  (My information on color selection and translucent glass comes from "The Passive Solar Energy Book:  A Complete Guide to Passive Solar Home, Greenhouse and Building Design" by Edward Mazria -- a good read for anyone contemplating passive solar construction.)
_________________________
*As I will discuss in detail in upcoming posts on air barriers and vapor barriers, air control and moisture control are closely related to the extent that to control air is to control moisture as well.

Wednesday, October 26, 2016

Design - Thermal Bridging and Air Infiltration

This the first of two posts on the subjects of thermal bridging and air infiltration

Our building project is defined more than anything by the use of the heat from the summer sun to eliminate conventional heating and air conditioning by a system called Annualized GeoSolar (AGS) but it is also unique in another extremely important way  -- having an envelope that is not just well-insulated but super-insulated.  "Super-insulated" has become the term for envelopes that exceed industry norms and building code R-factors with respect to the thickness of the insulation and control of thermal bridging and air infiltration.

If you are new to the blog or do not know about AGS, a quick study can be had by clicking on "Timeline - Annualized GeoSolar"  under "Featured Post" in the column to the left. Also Wikipedia's description of AGS is also a good overview.

The Envelope
The skin of a building in contact with the outside environment comprises the walls, roof or ceiling, floor, windows and doors collectively known as the "envelope".  A good part of green building boils down to keeping heat from entering (summer) or exiting (winter) the envelope.

Heat Transfer
Heat is transferred in three ways: 
  • Conduction - through solid objects, called "thermal bridging" when it is
    applied to the envelope of buildings; examples are heat passing through a window, both through the glass and through the frame, heat passing through 2 x 4 wall studs and heat passing through uninsulated foundations 
  • Convection - through fluid motion (air is a fluid); when air passes inward through the envelope, it is called "air infiltration"; when air passes outward, it is called "air exfiltration"; examples are air leaks around ill-fitting exterior doors, air leaks around receptacles and switches in exterior walls and air leaks between structural members such as top plates
  • Radiation - in a straight line through space, such as sunlight warming a floor or heat from hot water radiators, infrared space heaters and fireplaces
Best Practices
Following is a review of my understanding of best practices for controlling heat transfer back and forth through the envelope of a house.  The bulleted items that apply to our situation are linked to other posts on the same topic.

Thermal Bridging
The ways to control thermal bridging are..........
Thermal Bridging and Our Project
Instead of using through-and-through framing, we are using wall trusses that virtually
Wall truss
eliminate heat transfer through the wood members.  The walls will be insulated 
to R- 48 with rice hulls 15" thick. Our cathedral ceilings will be insulated to 16", again with hulls, with slightly more thermal bridging through the structural members than the walls, but not appreciably more because we will be using either I-joists or trusses rather than solid 2 x 12s.   We plan to splurge on high-end windows and doors in order to minimize conductive heat loss through these virtual "holes" in the envelope. There will be no windows on the north or the west to suffer wind washing and the windows on the south will be set into the wall 10" to further reduce wind washing.  Insulating the slab floor of our house will be a non-issue since it will be warmed by the AGS system. The slab floors of the garage and screened porch are already insulated as part of the insulation/watershed umbrella.

Cathedral Ceilings
Cathedral ceilings are a conundrum.  They enhance the aesthetics of interior space but can be a challenge to insulate compared to an attic into which any amount of insulation can be piled.  For our cathedral ceilings the jury is still out at the time of this writing as to whether we use man-made I-joists or custom trusses, either of which are a better choice than 2 x 12s for three reasons: (a) the maximum depth of ceiling insulation is determined by the height of the rafters and the height of 2 x 12s is limited to 11 1/4" whereas the height of I-joists can go at least to 16" and trusses can be any height; (b) as we pointed out above, through-and through dimension lumber transmits heat while I-joists and trusses minimize through-and-throughness; (c)  I-joists and trusses are a greener alternative since both are made from sustainable forest products whereas 2 x 12s are almost certain to come from old growth timber, especially in 20+ foot lengths that our project requires.

North Wall and Floor
Since the AGS system requires free exchange of heat between the inside air and the soil behind the wall (and below the floor), thermal bridging (conductive heat transfer) through the concrete is a good thing except for the top few feet of the wall protruding above the insulation/watershed umbrella,   The concrete above the umbrella will be super-insulated to nearly, or the same, R-factor as the stick-built truss walls using EPS solid foam panels on both sides of the concrete portion of the wall (DIY concrete wall insulation).  The top 3' of the wall above the concrete will be stick-built to match the other exterior walls and insulated with at least 15" of rice hulls. 

At the time of this writing, I am thinking about using rice hulls to insulate the inside of the concrete wall above the umbrella by increasing the thickness of the 3' stick-built portion on top of the concrete to, say, 21".  At this thickness, 2 x 6 framing could be butted up against the stick-built wall from below to hold rice hulls against the concrete.  With 3 1/2" of foam board exteriorly and 5 1/2" of rice hulls interiorly, the R-factor of the concrete wall would then match that of the truss walls for the rest of the house.  The extra bulk interiorly would not be intrusive because it would be overhead.

The slab floor is an automatic.  The AGS system will keep it at 74 degrees (+/-4 degrees) year-round.  In winter, it is thermal bridging through the slab that will heat the house; in summer, it is thermal bridging through the floor that will siphon off excess heat. But in order to do so, the soil under it must be bone dry.  Otherwise, water would carry heat away to the water table faster than the solar collector could generate it. Accordingly, the French drains located 10' below floor level and the insulation/watershed umbrella extending 20' outward from all sides of the house should take care of any surface or subterranean water threatening the AGS system.

Conductive Heat Loss (Thermal Bridging) To and From the Thermal Mass
The AGS system is predicated on a large thermal mass comprising the slab floor and the
Umbrella installation in front of the house; the foam board
layer was the third layer among a total of ten layers that
comprise the umbrella
gravel and soil under it as well as the tall earth contact north wall and the soil behind it.  The imperative is to control heat loss from the mass during the cold months so that the heat gained by the solar collector during the warm months is enough for a comfortable year-round floating temperature
 in the living space.  In order to increase the amount of thermal mass and push heat loss at its periphery as far out as possible, waterproofing and insulation extend outward from the house 16 - 20' in all directions, as discussed in design of the umbrella and as demonstrated in three subsequent posts starting with the installation phase.

This post has detailed conductive heat loss through the envelope by thermal bridging. The next post will cover convection and radiation.

Saturday, October 15, 2016

Construction - Back to Dirt Work - Insulation/Watershed Umbrella (Cont'd some more)

This is the third post on the insulation/watershed umbrella.  The first post covered some tasks that had to be done before starting the umbrella then it described the installation of the first three layers of the umbrella.  The second post detailed the installation of the next six layers.  This post covers the last layer -- the topsoil backfill.  

Reminder:  click on any photo to enlarge it to full screen.

Vacillation on Methods
For months, I have dreaded the time when the umbrella had to be backfilled because I assumed that it would have to be done with wheelbarrows and shovels instead of the trackloader in order to avoid damaging the underlying sheet plastic and foam board insulation. The excavation contractor who had done work for us earlier described a method for using the loader safely.  Not only was it rather complicated but I felt that my track loader skills were not up to the task.  Ultimately I did use the loader somewhat like he recommended but only after some trial and error.

By the time we had installed the two layers of carpet and the four layers of sand over the foam insulation, I became convinced that the umbrella might be resilient enough to withstand the weight of the loader.  But I still bought three sheets of 3/4" plywood to lay down in front of the loader on which to drive thinking that the weight would be more evenly distributed and less likely to damage the umbrella.  But this method took three of us -- I drove the loader while two guys moved the plywood.  

Trackloader Saves the Day
First few tentative trips onto the umbrella with the
trackloader before deciding that it could be used for
backfilling without damaging the umbrella
After the first trip onto the umbrella using the plywood, we realized that the soft loamy topsoil, close to 2' deep, would suffice as a cushion as long as I avoided two maneuvers that the contractor warned about -- spin turns or raising the bucket too high.   So I began bringing in the topsoil in straight line pathways and, in so doing, not only distributed the soil but also began slowly to compact the soil over which I passed. Eventually, the compaction was enough that I felt comfortable making looping turns to fill in the gaps in the corners that were left by the straight line pathways.  And, as much as possible, I used straight pathways when smoothing and leveling the grade.

I would estimate the amount of backfill we used over the umbrella at 3 - 4 tandem truck loads or 40 or 50 loader bucket loads.  To
The backfilling about half done; notice that it is easily deep
enough to support vegetation; we plan to use shallow-
rooted native plants eventually even though turf grass
 is going in first to stabilize the soil against erosion in 
the short term
have moved this much fill with wheelbarrows would have been unbelievably arduous and time-consuming.


Perfecting the Grade for Seeding
Final grading with hand tools; ready for seeding
I thought I had done a pretty good job with the loader with regard to sloping the grade over the umbrella for proper drainage and leaving a smooth surface almost ready to seed.  But, on close inspection, it left a lot to be desired.  So I rented a self-propelled tiller and asked friend Pat to help run it for the several hours it took to loosen the soil enough to be able to shape and smooth it with hand tools, which, in itself, took 1 1/2 man-days between my wife's Uncle Archie and I.

Seeding and Stabilizing
Coffee bag burlap over grass seed to prevent erosion
Our long-term goal is to landscape with native plants instead of turf grass but the immediate goal was to establish a cover crop that would prevent erosion of the soil during the heavy rains next spring. Consequently, we planted conventional grass seed with the intention of replacing it over time with ground-hugging shallow-rooted natives (if there is such a thing as shallow-rooted native plants).
Wheat straw over grass seed to prevent erosion

Our soil is wind-blown loess left by the glaciers.  In order for it to have been transported by the wind, the particle size had to have been minute -- a fine-grained silt -- which is highly erodible.  In order to hold it in place on the steep slopes, I cut open recycled coarse burlap coffee bean sacks and fastened them together with hog rings.  After the seed was broadcast, we positioned the burlap over the slopes.  The burlap was stable in the wind so we only needed to anchor it by stapling it to boards laid under the critical edges of it, as opposed to anchoring it also in the middle with landscaping fabric staples.   All but a small section of the remainder of the seeded area was covered with wheat straw for erosion control.
The French drain can be seen in the
shadows to the left
Finally, we used a sprinkler to compact the burlap and straw, to stick the seed to the soil and to jump-start germination.  And luckily, it rain a few days later. 

Tweaking the Solar Collector Before Surrounding It With Topsoil 
Before adding the topsoil to the slope immediately south of the solar collector, I needed to dump six loader buckets of sand into the collector for use later when it goes into service as part of the AGS system. However, as described in a previous post, water collected in the collector numerous times and deposited about a foot of soil that had to be removed. The main reason for its removal was to uncover a French drain that passed under the collector (one of seven placed early onso that it would be available to drain any water falling into the collector after it is finished.  As step-son, Keith, and I pitched the excess soil over the wall of the collector, we shaped the dirt floor so it will direct water to the French drain after it soaks through a thick layer of sand.  The sand overlaying the soil will support the corrugated steel that will adsorb the sun's rays for the AGS system -- the topic of a future post.
Collector after the sand has been added and
spread enough to cover all of the soil

As for the time being, we merely made sure that all of the dirt floor was covered with sand until the collector can be finished then left the rest of the sand piled up.

Insulating the Porch Footing
Another task to be done before finishing the topsoiling was to insulate the screened porch footing.  Since the foundation of the porch is a frost-protected shallow foundation, the footing needed to be insulated on its exterior where not already insulated by the umbrella, i.e., on the three sides not facing west towards the umbrella.  

Future Plans for the Insulation/Watershed Umbrella
Now the only area within 20' of the front of the house not covered by the umbrella is the section in front of the main entrance and the garage.  The umbrella here will be installed next year in conjunction with pouring the sidewalk and driveway.  The umbrella next to the retaining wall west of the house and the umbrella behind the concrete north wall of the house will also be installed next year.
Insulation at the level of the porch footing before backfilling

Landscaping Beyond the Umbrella
The catch basin lies in the rough ground south of the umbrella and the solar collector.  Because the basin is critical for keeping runoff onsite, it and the area around it will be the last portion of the building site to be landscaped.  The basin will give way to a series of rain gardens planted with natives so that rainwater will leave the property underground and purified instead from the surface and contaminated.
Rough area containing the catch basin (click on photo to enlarge it)

I guess we were pretty fortunate considering that it took almost three weeks to install the umbrella without having to deal with any serious rain. The final photo shows the site in mid-October as we return our attention to the carpentry phase in hopes of getting the house under cover before the rainy season in spring and early summer.
Status of the building site after the latest round of dirt work


Thursday, October 6, 2016

Construction - Back to Dirt Work - Insulation/Watershed Umbrella (Cont'd)

The last post covered the first three layers of the insulation/watershed umbrella.  This post deals with the next six layers.  A subsequent post will talk about the last layer -- the topsoil.  
And the usual reminder:  click on any photo to enlarge it.

SAND
Now that the insulation and a thick layer of sand made for a rather squishy surface on which to work, wheel barrows were out of the
A thin layer of sand covers the foam board
question for subsequent layers of sand, so the real work began.  I brought loader buckets of sand to the periphery of the umbrella in three places then we broadcast the sand shovel-by-shovel and broomed the sand until the first layer of plastic was uniformly covered but only half as thick as the first layer of sand. The purpose of using another layer of sand is primarily to serve as a drainage plain in case any water penetrates the top layer of plastic. It also smooths out the transitions as the thicknesses of foam go from 4" to 3" to 2".  The drainage would have been even better by having a thin layer of sand between the first layer of plastic and the foam board as well as on top of the board but I was afraid that the sand would cause the foam board to scoot around when we walked on it and pitching sand was already getting to be a little tiresome.

Intermediate layer of plastic sheeting batten down for the night

PLASTIC SHEETING
We merely butted this second layer of sheeting against the foundation wall instead of mating it with the sheeting extending from under the cement board/stucco covering on the foundation and the retaining wall.  The purpose of this layer is to provide another barrier to water penetrating the umbrella should the top layer of plastic be breached.

SAND
Another thin layer shovel-broadcast and evenly spread.  The purpose of this layer of sand is to provide a drainage plain for any water penetrating the top layer of plastic sheeting. Without it, the weight of the topsoil layer would pinch the two sheets together so tightly that water would trapped between the sheets and not be able to escape down-slope.

PLASTIC SHEETING
This layer was butted against the foundation walls and the retaining wall then the second sheet hanging out from under the cement board/stucco foundation and the retaining wall was shingled over it.  As with the first two layers of plastic, one long piece went from the screened porch to the western end of the excavation, a distance of almost 60'.  A shorter piece was installed between the west wall of the house, the extent of the excavation and in front of the retaining wall, such that it overlapped the first piece in shingle fashion by a large margin.  The two together pretty much used up a 100' roll of plastic.

SAND
The top layer of plastic will be the primary barrier against moisture penetration into the envelope but it is imperative that any moisture it collects finds an unobstructed passage off of the umbrella.  So the last layer of sand provides the drainage plain through which water will easily exit the envelope.  I reasoned that this layer should be little thicker for drainage purposes and to withstand some redistribution as the carpet was tweaked into position.

SALVAGED CARPET
The primary function of the carpet is to protect the sheet plastic from physical damage caused by someone digging in the topsoil layer who doesn't know, or forgets, about the underlying umbrella.  It will discourage aggressive plant roots (although we plan to landscape with native ground-hugging plants with shallower roots).  And burying the carpet is also a green thing in that it keeps it out of the landfill.

I have been collecting used carpet for several years in anticipation of making it the last
The last layer of plastic has been covered with a substantial layer of
sand;  Pat and Roger are in the process of laying down the first layer
of carpet by simply laying it in place and unrolling it, thereby keeping the
appearance side up
layer of the envelope before backfilling with topsoil. Most of my stash of carpet came from friends and family who knew to keep the pieces as large as possible.  As it turned out, I was short by about 1,200 sq ft. Fortunately, +/- 800 sq ft appeared on Craigslist the first day I realized that I was short. For the remainder, I tried networking with carpet layers who are willing to keep the pieces large until I could come by and help carry them out.
However, I found that carpet layers remove old carpet by cutting it into narrow strips that, when rolled up, are easy to carry out of the building, and that those I contacted did not want to bother with an alternative approach.  I ended up dumpster-diving behind a floor covering store (with permission) to find pieces big enough to finish the project.

We laid the carpet upside down in two layers, each in shingle fashion to shed water that
We ran out of carpet when the larger area in the distance
was covered with two layers but the area in the middle
distance had only one layer of carpet and the area in the
near distance had none; nevertheless, it was possible to
begin the backfilling while obtaining more carpet as
evidences by the track loader in the background
would be flowing on top of it and taking care to mismatch the junctions between pieces in the two layers so that all areas were sure to have at least two layers of protection between the topsoil and the sheet plastic.  We also unexpectedly found that it was best to lay the first layer right-side-up for a couple of reasons. First, and most important, rolled carpet always seems to come with the backing side out and, when unrolled, has the appearance side up.  If we were to have insisted that the first layer be upside down as originally planned, we would have had to unroll it and re-roll it to be able to position it correctly without disturbing the sand.  To say it another way, it would not have worked to have unrolled it then dragged it into position across the sand, as opposed to merely unrolling it across the area of sand that needed covering.  There was a second reason for laying the first layer right-side-up. After the first layer was in place and we were laying the second layer upside-down, it was easy to keep track of which areas had not been covered with the second layer. Having the "good side" of the first layer exposed meant that, at a glance, we could see which areas had not yet been covered with upside-down carpet.  The second layer was easier to lay in that it did not have to be unrolled precisely where it was to end up -- it could be unrolled close to its final destination and dragged to place across the first layer of carpet.


A Couple of Additional Nuggets
Hiat, the principal authority on the envelope, warned that the plastic sheeting would probably be punctured while laying it but not enough that its function would be compromised.  However, we saw no evidence of punctures.  6 mil plastic is pretty tough stuff and the layers of sand cushioned it from the underlying rough soil and gave it enough resiliency that we could walk on it with abandon.

The carpet must be of synthetic fibers, not wool, in order not to biodegrade in the soil.  Also, it is important to protect the carpet from UV rays while in storage which is as simple as covering it with tarps that are of sufficient quality to resist UV disintegration themselves. We had to discard a few yards of carpet that were not adequately protected by the tarps. Another benefit of keeping them covered is that they stay dry and are lighter when handling them for the umbrella.

          *          *          *          *          *          *          *          *          *          *

The topsoil backfill will be the subject of the next post, especially how we solved the dilemma of using the track loader on top of the envelope without crushing it. 

Tuesday, September 27, 2016

Construction - Back to Dirt Work - The Insulation/Watershed Umbrella

As much as I would have liked to have continued with the carpentry phase of construction, the reality was that it was mid-September and we had only a few weeks to finalize the grade in front of the house and get it planted with a cover crop to control erosion during the rainy season next Spring.  Consequently, with the internal bearing walls in place, it was time to shift our attention to more dirt work.

The main job was to get the insulation/waterhed umbrella installed.  (Click on the "Featured Post" feature in the left column for linkage to Annualized GeoSolar and the role of the umbrella.)  However, loose ends had to be taken care of first.  The porch foundation had to be insulated and clad in the manner described for the east garage wall.  The exterior of the insulated concrete forms for the house foundation wall had already been covered with cement board but still had to be parged with stucco.  The grade needed tweeking before the umbrella was installed.  The umbrella needed to be laid down and covered with topsoil and the topsoil needed to be blended with the grade further down the hill in front of the house.  Finally, the cover crop needed to be planted no latter than mid-October.  Oh, boy! The race was on.

Insulation for the porch foundation; the footing extends
below the insulation and will be insulated eventually with
more foam board laid horizontally
Insulating the Porch Foundation
Cement board over the insulation
The foundation for the screened porch needed to be insulated in order for it to meet code as a frost-protected shallow foundation.  The porch floor was intentionally poured 3 1/2" wider than the foundation wall on all sides in order to accomodate 2 1/2" of foam insulation and +/- 1" of cement board parged with stucco. For details on the DIY insulation for concrete walls, check out a prior post.  In addition to vertical insulation for the wall, horizontal insulation laying on the footing and extending out 2' on the three sides that are not part of the umbrella is necessary to complete the frost-proofing.  It will be installed in conjunction with final backfilling against the porch foundation before winter sets in.

Stuccoing the Foundation
The house foundation was insulated automatically by using insulated concrete forms but
Stepson, Keith parging the cement board with stucco

Friend, Roger, parging the cement board that covers the insulated
 concrete form
needed to be veneered for appearance-sake and to protect the foam from damage.  Again, I used 1/2" cement board. The next task was to stucco the cement board on the porch and house foundations in exactly the same manner as described in the prior post. The stucco serves two purposes.  It improves the appearance of the top part of the foundation visible above grade and it seals the cracks between the cement board panels against freeze-thaw damage.

Insulation/Watershed Umbrella
The grade for the umbrella was largely done months earlier with the track loader but had been overtaken with grass and weeds that I did not attempt to combat because they controlled erosion.  Now it was a matter of using the trackloader blade, tipped up as a scraper, to remove the vegetation then spending a couple of days tweeking the exposed dirt with hand tools to be sure the insulation met the foundation footing correctly, the soil surface on which the umbrella would lay was as smooth as possible and that the entire area would drain properly.
The grade after removal of vegetation with the track loader
and tweeking with hand tools; notice that the dirt is still not
smooth enough to protect the plastic sheeting from puncture

Parenthetically, parts of the umbrella were already in place.  The insulated and impervious garage and screened porch floors comprise most of the umbrella on the east side of the house. I will install the rest of the umbrella on the east next year before the concrete walkway to the main entrance and the driveway are placed over it.

Building the Umbrella
The umbrella consists of ten layers as follows, starting from the grade and moving up through the umbrella:

Sand / 6 mil plastic sheeting / foam insulation board / sand / 6 mil plastic sheeting / sand / 6 mil plastic sheeting / sand / two layers of recycled carpet laid upside down / topsoil.

This configuration for the umbrella deviates only slightly from the one John Hiat describes in his book, Passive Annual Heat Storage, primarily by virtue of our liberal use of sand.  I will discussing the first three layers of the umbrella in this post and the last seven layers in the next post.

SAND
Two-inch thick sand layer over the raw soil to protect the
overlying plastic sheeting
Fortunately, I was able to enlist the help of step-son, Keith, and our friend, Roger, for the installation, which would have been extremely arduous for me working alone after having just done the dirt phase alone.

The dirt surface, despite all of the hand work, was too rough on which to lay the first layer of plastic sheeting without worrying it being compromised when loaded.  So we covered it with +/- 2" of clean sand.  I could bring the sand only to the periphery of the umbrella with the loader so we had to use wheel barrows to distribute it.  We found that a push broom, used mostly upside down, to be the most useful tool for spreading and leveling the sand.  

PLASTIC SHEETING
First layer of plastic sheeting with foam board on it
to help hold the top edge in place as it is stretched out
The best buy on 6 mil sheet plastic that I could find was at a farm and home center in the form of a 24' x 100' roll which was only a little more than what we needed for each layer of plastic going into the umbrella.  We cut and laid the first layer of sheeting over the sand base.  I previously had left two layers of plastic sheeting hanging out under the cement board/stucco covering for the house foundation and from under the rock retaining wall to the west of the house that needed to be woven into the sheeting of the umbrella. The first overlapped in shingle fashion the edge of the first umbrella sheet.

FOAM INSULATION
Most of the umbrella extends 16' feet from the house (20' would have been better but the
Most of the foam board in place and anchored for the night
placement of the solar collector and the under-dug embankment west of the house changed the rules). So the pattern for the foam insulation, based on Hiatt's prescription, was as follows:  4" thick for the first 8', 3" thick for the next 4', 2' thick out to the 16' periphery.  And in the few places the full 20' was possible, 2" thick for the last 4' (Hiatt recommended 1" but a sheet that thin at the periphery could be crushed too easily).


Balance of the foam in place; notice that the weaker white EPS
board in the first tier has been covered with the stronger XPS
 board in the second tier
In all, it took 70 sheets of 2" board, 20 sheets of 1" board -- all laid as much as possible so that the cracks between sheets in the first layer did not line up with the cracks in the second layer. Expanded polyethylene (white board in the pictures) is half the cost of extruded polyethylene (blue board) so about 40% of the 2" boards were EPS installed under the more rigid and relatively crush-proof  XPS.

Part of the hand work for the grade preparation was to make sure the first 2" layer of foam board butted up against the footing and was flush with the top of the footing.  In this way, the second layer rested on the footing and against the foundation wall so as to fulfill the requirements of a frost-protected shallow foundation. As mentioned above, the cement board/stucco cladding for the foundation wall was backed by two layers of plastic sheeting that stuck out quite a ways at the bottom.  The innermost layer overlapped in shingle fashion the plastic sheeting that laid directly on the sand bed.  As we will see in the next post, the outermost layer overlaps the top layer of the umbrella plastic.  The loose ends of plastic sticking out from under the stone retaining wall were handled in the same way.

Saturday, September 17, 2016

Design - Photovoltaic Array

Not "If" but "When"?
If we install photovoltaic cells, our electric company will allow us to use reverse metering to export electricity to the grid when we produce more than we consume. Unfortunately, unless the rules change, we will be credited at a lower figure when exporting (meter running backwards) than what we will pay for electricity when importing (meter running forwards).   Our goal is to break even with the power company without over-spending on photovoltaics but we won't know until we live in the house for awhile what it will take to do so.  Then we can size the photovoltaic array to our needs or perhaps decide that the return on investment for an array would be problematic.

Other Advantages of Waiting
In addition to monitoring our needs before investing in solar, there are other advantages to waiting.  Solar prices keep coming down and the panels almost certainly will be cheaper in the near future.  Utility company rebates and government rebates and tax credits come and go but I think the probability of this kind of help may actually increase over time pending which political party dominates at the federal and state levels.

Disadvantages of Waiting
Installing the panels initially would afford the opportunity of having them double as an
overhang for the second level clerestory windows, as shown on the accompanying
Click on drawing for expanded view
drawing, and thereby eliminate the cost of a conventional overhang.  The conduits and wiring from the array to the service panel would become part of construction instead of an afterthought.  However, we are more inclined to delay construction of the overhang for a couple of years anyhow in order to use the heat from the summer sun to jump-start the AGS system. Moreover, in order to function as a overhang for our latitude, the tilt of the PV panels would likely not be optimal for generating electricity.

Compromise Plan
We will probably decide to wait at least a year before investing in PV panels.
Instead of using the panels as an overhang for the second story clerestory windows, they will probably take the form of a free-standing array on the backfill behind the house that will be an easy electric hook-up and will be scarcely noticeable from the street. Free-standing, as opposed to attached, could include an upgrade to a mobile sun-tracking system to maximize solar gain.

Estimating Needs
The average rate-payer in the St Louis region uses 10,000 to 13,000 kilowatt hours per year, depending on whose figures one uses.  The 13,000 figure is about the average for the country as a whole.  The modern rental house in which we lived when first moving to Collinsville would be a better barometer of our electric usage than the 100-year-old farmhouse that we have since bought and occupy next door to the construction site. The rental unit had HVAC, electric range and electric dryer as the main demands on electricity.  We consumed 6,400 KwH/yr which is not much more than half the area-wide average, due in part to our sustainable-centric lifestyle and the reasonable size of the house.

Based on our experience in the rental unit, we are guestimating our electric needs in an energy neutral home to be 1,600 KwH/yr despite it being a larger house.  The load will be diminished, compared to the rental unit, by the intentional design of the house. Gas will be the choice for cooking and heating water (energy efficient tankless heater).  There will be no conventional electricity-scarfing air conditioning.  Abundant natural light in all spaces will minimize the use of lights during the daytime.  Most of the lighting will be task lighting.  General lighting will be controlled by manual override, dimmable motion activated switches so as to match use with occupancy. Energy-saving LED will prevail over CFL. Phantom loads will be minimized via strategic switching, not just for electronic equipment, but for mundane appliances like the toaster, microwave and clothes washer.  

Return on Investment
If an average consumer at 10,000 - 13,000 KwH/yr were to buy PV with enough capacity to make some dent in his/her energy consumption (forget about breaking even with the utility) the initial cost would be dependent upon how big a dent s/he wanted to make.  But the return on investment from energy savings would be protracted because her/his home was probably not designed for serious energy conservation.  My take is that adding PV to the average production home with 2 x 4 walls, or even 2 x 6 walls, and questionable attention to air-sealing, or to older homes like ours with no wall insulation, homes with solid masonry construction or homes with leaky windows and doors is like rearranging the deck furniture on the Titanic.

As counter-intuitive as it may be, PV for our super-insulated, passive solar project may not be a good investment.  Our consumption will be so low that the payback on a PV system that breaks even with the utility may not make sense.  On the other hand, it might.  The decision to invest in enough solar to be energy neutral might have less to do with cost-savings now as it does with insulating us from escalating energy prices in the future. If we add PV, it will be with the conviction that, with the current and future pressure on fossil fuel energy, the cost of electricity will only go up.

_     _     _     _     _     _

Update:  Summer of 2019.
It has become apparent that generous government incentives for purchasing PV are in danger of diminishing or disappearing.  So we are planning to invest in an array before the end of 2019.
 
Update:  Late summer of 2024.
By now, we have lived in the house approaching 3 years and recently posted on its thermal performance over an 18 months period.