The main job was to get the insulation/waterhed umbrella installed. (Click on the "Featured Post" feature in the left column for linkage to Annualized GeoSolar and the role of the umbrella.) However, loose ends had to be taken care of first. The porch foundation had to be insulated and clad in the manner described for the east garage wall. The exterior of the insulated concrete forms for the house foundation wall had already been covered with cement board but still had to be parged with stucco. The grade needed tweeking before the umbrella was installed. The umbrella needed to be laid down and covered with topsoil and the topsoil needed to be blended with the grade further down the hill in front of the house. Finally, the cover crop needed to be planted no latter than mid-October. Oh, boy! The race was on.
 |
| Insulation for the porch foundation; the footing extends below the insulation and will be insulated eventually with more foam board laid horizontally |
 |
| Cement board over the insulation |
Stuccoing the Foundation
The house foundation was insulated automatically by using insulated concrete forms but
 |
| Stepson, Keith parging the cement board with stucco |
 |
| Friend, Roger, parging the cement board that covers the insulated concrete form |
Insulation/Watershed Umbrella
The grade for the umbrella was largely done months earlier with the track loader but had been overtaken with grass and weeds that I did not attempt to combat because they controlled erosion. Now it was a matter of using the trackloader blade, tipped up as a scraper, to remove the vegetation then spending a couple of days tweeking the exposed dirt with hand tools to be sure the insulation met the foundation footing correctly, the soil surface on which the umbrella would lay was as smooth as possible and that the entire area would drain properly.
 |
| The grade after removal of vegetation with the track loader and tweeking with hand tools; notice that the dirt is still not smooth enough to protect the plastic sheeting from puncture |
Parenthetically, parts of the umbrella were already in place. The insulated and impervious garage and screened porch floors comprise most of the umbrella on the east side of the house. I will install the rest of the umbrella on the east next year before the concrete walkway to the main entrance and the driveway are placed over it.
Building the Umbrella
 The umbrella consists of ten layers as follows, starting from the grade and moving up through the umbrella:
Sand / 6 mil plastic sheeting / foam insulation board / sand / 6 mil plastic sheeting / sand / 6 mil plastic sheeting / sand / two layers of recycled carpet laid upside down / topsoil.
This configuration for the umbrella deviates only slightly from the one John Hiat describes in his book, Passive Annual Heat Storage, primarily by virtue of our liberal use of sand. I will discussing the first three layers of the umbrella in this post and the last seven layers in the next post.
SAND
 |
| Two-inch thick sand layer over the raw soil to protect the overlying plastic sheeting |
The dirt surface, despite all of the hand work, was too rough on which to lay the first layer of plastic sheeting without worrying it being compromised when loaded. So we covered it with +/- 2" of clean sand. I could bring the sand only to the periphery of the umbrella with the loader so we had to use wheel barrows to distribute it. We found that a push broom, used mostly upside down, to be the most useful tool for spreading and leveling the sand.
PLASTIC SHEETING
 |
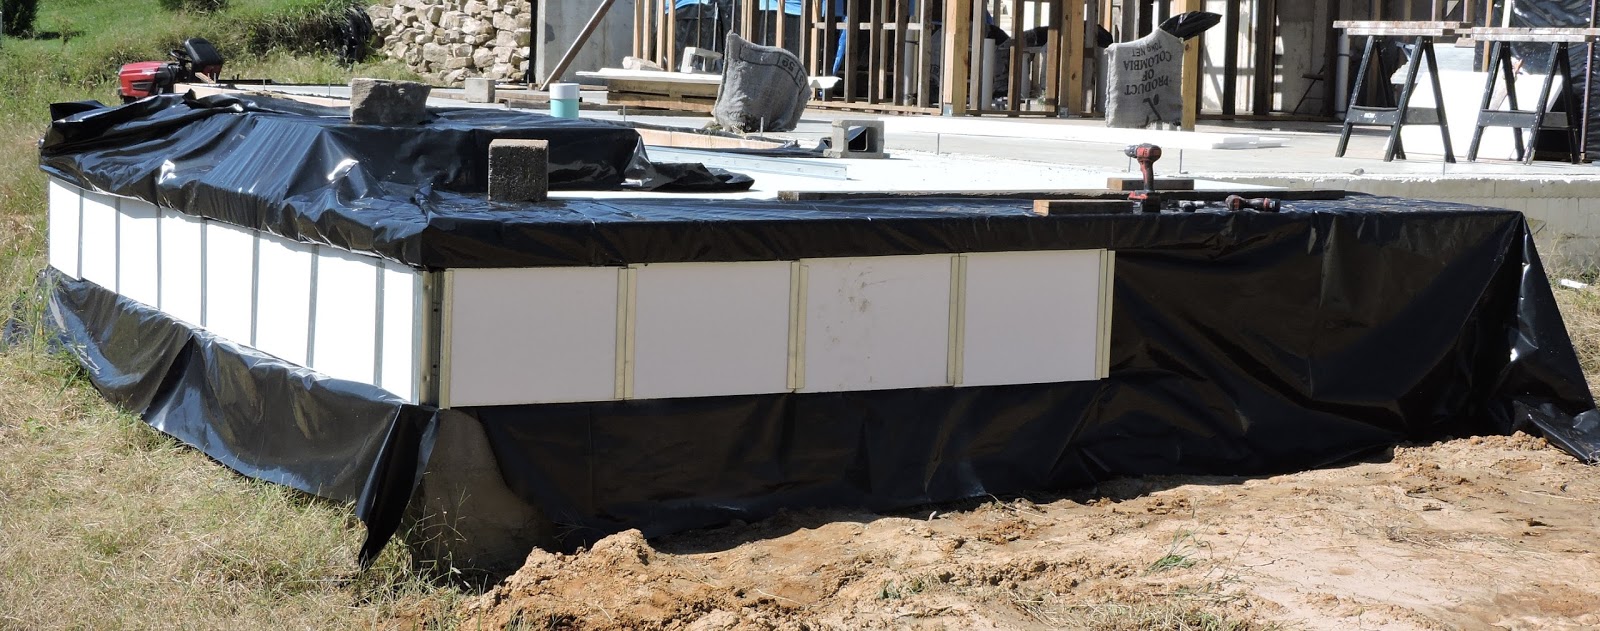
| First layer of plastic sheeting with foam board on it to help hold the top edge in place as it is stretched out |
FOAM INSULATION
Most of the umbrella extends 16' feet from the house (20' would have been better but the
 |
| Most of the foam board in place and anchored for the night |
 |
| Balance of the foam in place; notice that the weaker white EPS board in the first tier has been covered with the stronger XPS board in the second tier |
Part of the hand work for the grade preparation was to make sure the first 2" layer of foam board butted up against the footing and was flush with the top of the footing. In this way, the second layer rested on the footing and against the foundation wall so as to fulfill the requirements of a frost-protected shallow foundation. As mentioned above, the cement board/stucco cladding for the foundation wall was backed by two layers of plastic sheeting that stuck out quite a ways at the bottom. The innermost layer overlapped in shingle fashion the plastic sheeting that laid directly on the sand bed. As we will see in the next post, the outermost layer overlaps the top layer of the umbrella plastic. The loose ends of plastic sticking out from under the stone retaining wall were handled in the same way.